I’m Leo Liang, based in Guangzhou, part of the core team at Clipclop E-Bike, and honestly I kind of live in this e-MTB world every day. We don’t just ship bikes and forget them; we think about how our distributors, rental fleets and wholesalers actually run these machines and make money from them, long term.
For me, a 750W brushless motor or a clean hydraulic line isn’t just a spec on a brochure, it’s something I’ve seen fail or perform under real riders. I like to share what I’ve learned the hard way, plus a few “blogger-style” tips, so your e-bike fleet keeps its value instead of slowly turning into a pile of warranty claims.
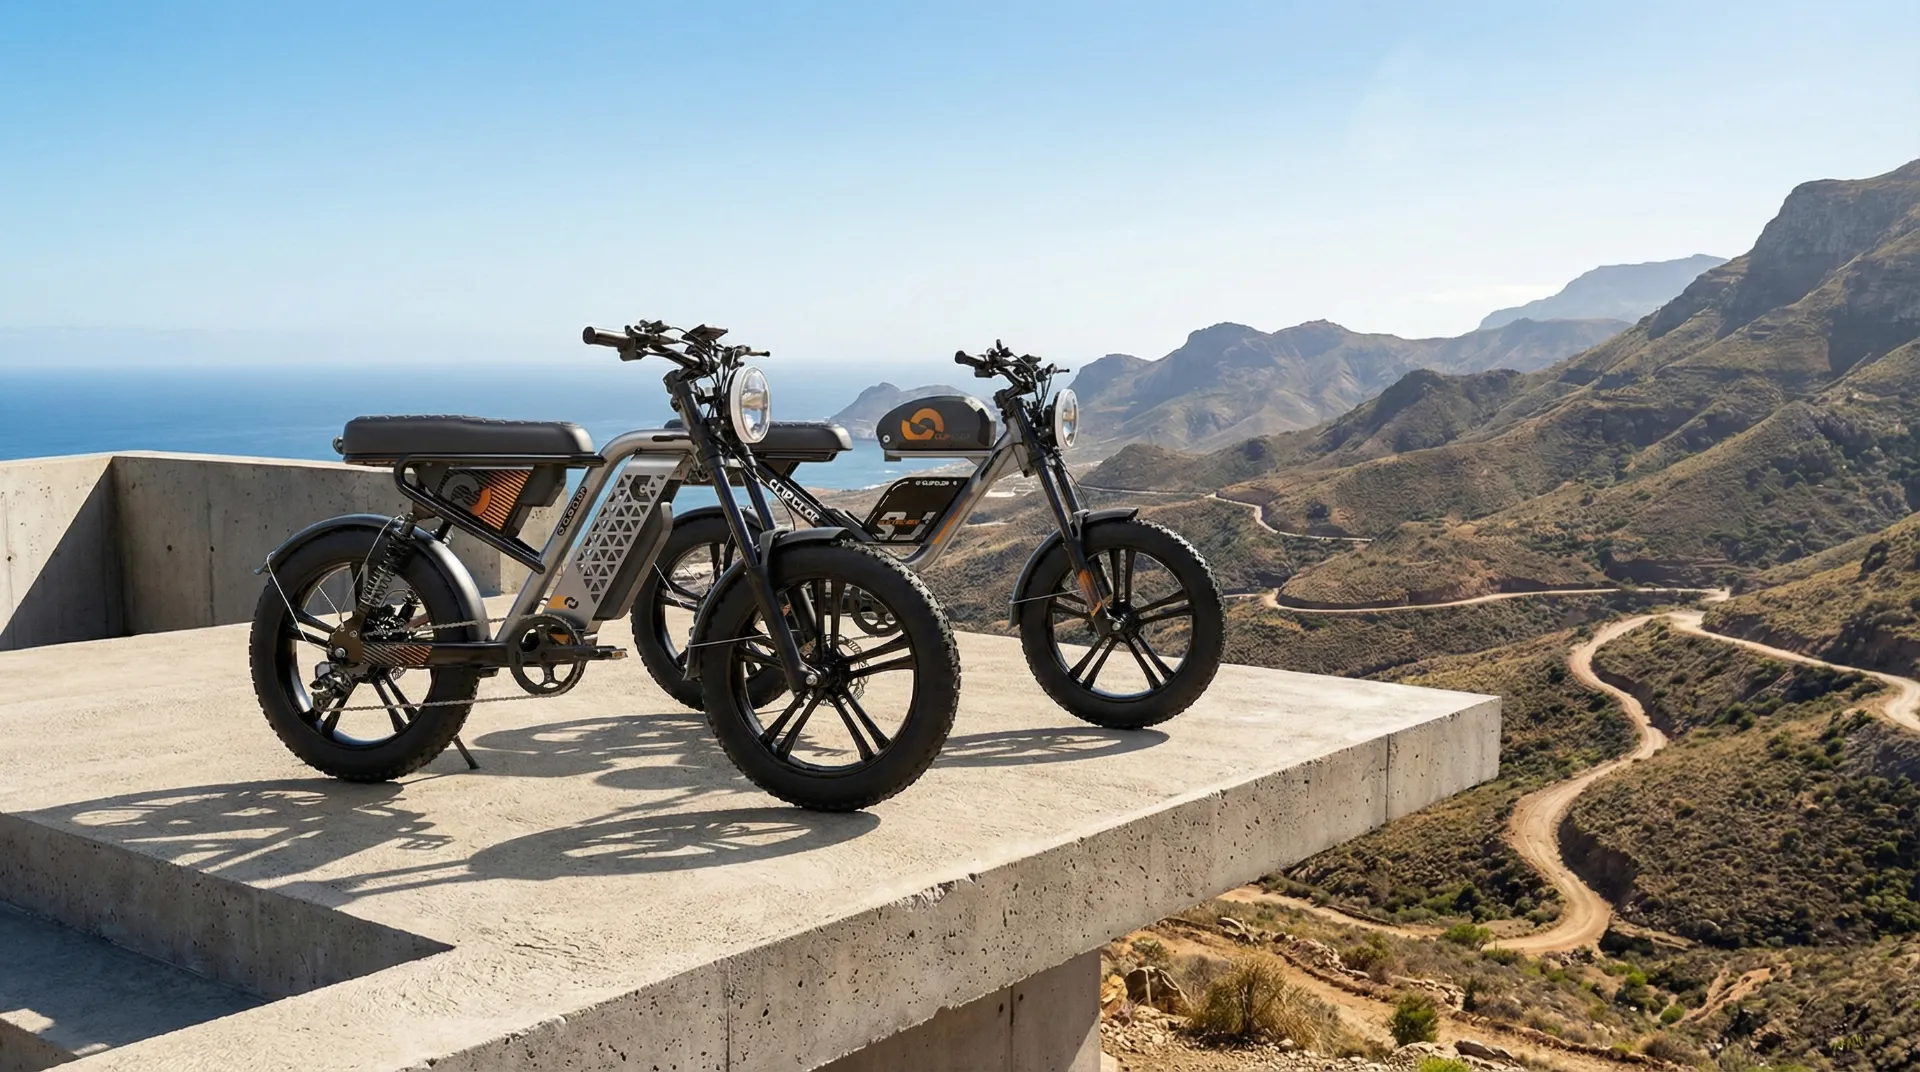
Today I want to zoom in on something that’s not flashy but absolutely decides whether your customers trust your bikes: hydraulic brake maintenance.[1][2] On a bike like our ClipClop L1 with its 48V 15Ah lithium battery and 51 km/h top speed, the brakes are not “one more feature”. They’re the main safety system, and if they feel spongy or react too slowly, that’s the kind of thing that ruins reputations fast.
I’ve seen it in fleets: one soft lever, one delayed stop, one close call, and suddenly the brand feels “unsafe” in that local market. That’s why I really push B2B partners to understand braking, not just leave it to a random mechanic. Knowing how to service these systems properly is part of modern fleet management, not an optional extra.
This guide goes past the basics you see on generic bike blogs. I’ll talk about how to spot early warning signs, walk through key maintenance steps, and unpack some of the “scary sounding” hydraulic concepts in plain language. Whether you run rental e-MTBs in rough terrain or stock high-performance models for dealers, you and your tech team should be able to keep every bike stopping clean and predictable.
My goal is simple: your fleet shouldn’t just be known for power and range, but for riders coming back saying, “Wow, the brakes felt super solid.” That kind of feedback turns into repeat business and better margins, and honestly it starts with small, boring routines done consistently, not some magic upgrade.
Why regular hydraulic brake checks really matter for fleets
If you run a fleet, you already know how much punishment these bikes take. Compared with normal bicycles, e-bikes are heavier, accelerate harder, and cruise faster, so every stop loads the braking system much more.[3][4] Add in off-road use and a powerful 750W motor, and you’re asking a lot from those calipers and rotors on every single ride.
Think about a customer dropping down a steep trail on a full-power Clipclop. They’re not thinking “Is this mineral oil fresh?” They just assume the lever will react instantly and predictably. If it doesn’t, you’re not just dealing with a bad review; you might be dealing with legal and medical problems. That’s why I treat hydraulic disc brakes as the real “core” of fleet safety, not the frame or the motor.
Hydraulic systems are great because they move force through an incompressible fluid, giving strong, smooth control.[1] But the flip side is they’re closed and a bit sensitive. When air sneaks in, you get that mushy lever and a scary drop in power. When fluid absorbs moisture or gets dirty, its boiling point drops, and under long descents the brake can fade just when the rider needs it most.
On top of that, pads and rotors wear every single time someone touches the lever. For a private owner, slow reaction might be annoying; for a fleet, ignoring this wear is basically gambling with your brand. From my point of view, a “no-excuses” inspection routine is part of your product, just like your logo or your spec sheet.
What I suggest is putting a quick, structured check before every rental or delivery. The tech squeezes both levers to feel for firmness, glances at rotor condition and thickness, and checks pad material with eyes and maybe a small light. It’s not about perfection; it’s about catching the obvious problems before they end up on the trail.
Once you build this into your process, it does two things: it keeps riders safer and quietly protects your reputation in the B2B space. In a crowded market, being the brand whose bikes “always feel sharp and safe” is a huge advantage, and that comes from boring routine checks done over and over, not from a single big upgrade.
Spotting early signs of brake wear and trouble
One thing I always tell technicians: don’t wait for failure. Hydraulic brakes almost always “talk” to you before they actually give up. Your job is to learn that language. A lot of times, the first clue is simply lever feel. If a lever pulls too close to the bar, or feels soft and bouncy instead of firm, air has probably snuck into the lines.
That “spongy” sensation is not something to monitor and “see how it goes”. It’s one of those issues that demands an immediate bleed, especially on high-speed e-bikes. When I see that in a fleet bike, I park it straight away. Letting it go out for one more day of rentals isn’t clever; it’s asking for drama.
Sound is another big helper. A sharp, high-pitched squeal can be a sign of contamination—maybe oil or cleaning spray on the pads—but it can also mean the pad material is basically gone and you’re down to the wear indicator. If you ignore that and keep riding, it usually turns into a harsh grinding noise that makes everyone nearby wince.
That grinding sound is the worst scenario: metal backing plate eating into the rotor. At that point, you’ve lost a lot of braking power and you’re also destroying the rotor surface with every stop. What could have been a cheap pad swap becomes a pad-plus-rotor job, plus extra labour, plus an annoyed customer whose ride got cut short.
Visual checks are boring but brutally effective. I always recommend that techs look at pad thickness regularly, not just when a rider complains. Many brands say replace at about 1.5 mm of friction material or less, and that’s a good rule to follow. Don’t try to squeeze “one more weekend” out of thin pads on fleet bikes; it’s not worth it.
Rotors also have a minimum thickness printed on them, something like “Min TH 1.5 mm”. Using a simple caliper to check rotor thickness and wear is a small step that can prevent overheating and potential failure under hard braking. While you’re in that area, scan for fluid leaks around the caliper pistons and hose joints. Any wetness there should be treated as urgent, not optional.
How I think about a proper brake bleed
A good bleed is one of those jobs that seems intimidating until you’ve done it a few times. But for fleet use, it’s absolutely core maintenance. The whole point is to kick out any air hiding in the hydraulic system and replace tired fluid with fresh stuff. Air compresses, fluid doesn’t, so air means wasted lever travel and weaker braking. Simple as that.
I always start by setting up the bike properly. Secure it in a stand and rotate the lever so the bleed port is the high point; that gives any trapped air a clear path out. Before touching the fluid, pull the wheel and pads. This step feels annoying, but it saves you from soaking pads with fluid and throwing away brand-new parts by mistake.
Once the pads are out, drop a bleed block into the caliper to keep the pistons pushed back. This little plastic piece is easy to forget but really important. Without it, pistons can creep out during the bleed, making the final lever feel inconsistent. I’ve learned this the hard way, so now I always double-check the block is in place.
After prep, you hook up the syringes or funnels according to that specific brake brand’s method. Usually you’ll have one at the caliper and one at the lever. I like to slowly push fresh fluid from the caliper upward, watching bubbles come out at the lever side. While doing that, gently tapping the hose and caliper helps shake loose stubborn air pockets.
I repeat this push-pull motion until I stop seeing bubbles in the clear hose or syringe. Then I seal the ports carefully, wipe everything down with alcohol so no fluid stays on the bike, reinstall the pads and wheel, and give the lever a few strong pulls. The target feel is firm, predictable, no dead zone. If it’s not right, I’d rather redo it than send the bike out half-fixed.
Pads and rotors: where the real stopping happens
Bleeding handles the inside of the system, but the actual stopping is all about pads and rotors. For fleets, these are pure consumables, and trying to stretch their life too far usually backfires. Riding style, terrain, rider weight, even weather can change pad life a lot, so a fixed “X months” rule doesn’t really work. You need regular checks.
On pads, I’m a big fan of quick visual inspections. Get into the habit of actually looking at how much friction material is left. Once you’re down around 1.5 mm, just replace them. Thin pads heat up faster, lose power, and can start damaging the rotor surface. On a high-usage rental bike, saving a few days on pads is just not clever business.
Choosing the right pad compound matters too. Sintered (metallic) pads handle heat better, last longer under heavy use, and stay dependable in wet, muddy conditions. They can be noisier, but for trail rental fleets, I usually recommend them because durability wins. For quieter, less aggressive city or touring use, organic pads feel nicer and bite faster, which many casual riders prefer.
Rotors deserve the same attention. They slowly get thinner with use, and a rotor under its minimum thickness is more likely to warp, overheat, or even crack under extreme loads. Grab a digital caliper when the wheel is off and check it against the stamping on the rotor. If it’s at or below the limit, plan a replacement instead of waiting for a failure.
When fitting new rotors, I always remind techs to clean them thoroughly with isopropyl alcohol before seeing any pads. Manufacturing oils or fingerprints can cause noise and poor performance. Also, use a torque wrench on the rotor bolts—over-tightening or uneven tightening can introduce vibrations or slight warps that come back as annoying rubbing later.
Table: Sintered (Metallic) vs. Organic (Resin) Brake Pads
| Feature | Sintered (Metallic) Pads | Organic (Resin) Pads |
| Composition | Fused metallic particles (e.g., copper, bronze) under high pressure and heat. | Organic fibers (carbon, rubber, Kevlar) bound together with resin. |
| Performance in Wet | Excellent. Maintain consistent stopping power in wet and muddy conditions. | Poor to Fair. Can lose significant braking power when wet and take longer to recover. |
| Heat Management | Superior. Better at dissipating heat on long descents, highly resistant to brake fade. | Fair. More susceptible to overheating and brake fade under sustained heavy braking. |
| Durability & Lifespan | Longer lasting. The metallic compound is highly durable and wears slowly. | Shorter lifespan. The softer compound wears more quickly, requiring more frequent replacement. |
| Rotor Wear | Harder on rotors, can lead to slightly faster rotor wear. | Gentler. Causes less wear on brake rotors over time. |
| Noise Level | Can be noisier, with a tendency to squeal, especially when wet or not bedded-in properly. | Very quiet. Offers smoother and quieter braking operation. |
| Initial “Bite” | Less initial grab; power delivery is more progressive. | Stronger initial bite. Feels more powerful on the first touch of the lever. |
| Ideal B2B Application | High-Performance Fleets: E-MTB rentals, downhill use, operations in wet climates, heavy-duty applications. | General Use Fleets: Urban rentals, bike path tour bikes, operations in dry climates, prioritizing quiet operation. |
Mineral oil vs DOT fluid: how I explain it to teams
This topic confuses a lot of people at first. The key thing I repeat is: you don’t choose the fluid; the brake manufacturer already chose it for you. Mixing them up is one of those mistakes that can absolutely kill seals and hoses. Shimano and Magura, for example, are mineral oil; SRAM and Hayes generally use DOT fluid. Always check, never guess.
Mineral oil is hydrophobic, which means it doesn’t absorb water. That sounds perfect, but it has a catch. Any water that somehow gets into the system will sink to the lowest, hottest point, usually the caliper. There, under heavy braking, it can boil at around 100°C and cause an abrupt, scary loss of braking power. On the plus side, mineral oil is gentle on skin and paint.
DOT fluid behaves differently. It’s hygroscopic, so it gradually absorbs moisture from the air. That water is mixed throughout the fluid instead of sitting in one spot. The downside is the boiling point slowly drops over time, so performance fades more gradually, and you need to replace the fluid regularly—typically every one to two years—to keep things sharp.
The nice thing about DOT is that it’s standardized by the Department of Transportation, so DOT 4, DOT 5.1, etc., follow strict specifications. Mineral oil, by contrast, is brand-specific. You can’t safely mix one brand’s mineral oil with another’s experimental blend. For fleets, I always suggest labeling stock clearly and training staff to double-check fluid type before any bleed.
From a practical point of view, both systems work great when maintained correctly. The real problems appear when somebody tops up a DOT system with mineral oil “just this once”, or leaves DOT fluid unchanged for years in a rental bike. A simple rule I push is: match the brand’s spec, log the bleed date, and stick to a realistic replacement schedule.
Table: Mineral Oil vs. DOT Fluid at a Glance
| Feature | Mineral Oil | DOT Fluid (4 & 5.1) |
| Core Property | Hydrophobic (repels water) | Hygroscopic (absorbs water) |
| Water Handling | Water pools at the lowest point (caliper), risking sudden steam-induced failure. | Water is dispersed throughout the fluid, leading to a more gradual performance decline. |
| Boiling Point | Remains stable over time as it doesn’t absorb ambient moisture. | Gradually decreases over time as it absorbs moisture from the atmosphere. |
| Maintenance Impact | Less frequent bleeding required, but contamination is a serious risk. | Requires regular bleeding and fluid replacement (typically every 1-2 years) to maintain a high boiling point. |
| Corrosiveness | Non-corrosive to paint and skin. Environmentally gentler. | Corrosive to paint and requires careful handling. Must be cleaned from surfaces immediately. |
| Common Brands | Shimano, Magura, Tektro (some models) | SRAM, Hayes, Formula, Hope |
| Key B2B Takeaway | Lower routine maintenance but catastrophic failure potential if water enters the system. | Higher routine maintenance schedule but more predictable performance degradation over time. Never mix or substitute. |
Lever reach: small tweak, big safety gain
The part of the brake system riders actually touch is the lever, and I feel it’s underrated. Lever reach adjustment sounds tiny, but it can completely change how confident someone feels on a bike. Most modern hydraulic levers let you tweak the distance from the bar, which is perfect for fleets with riders of all shapes and hand sizes.
If a rider has small hands and the lever is too far away, they end up stretching for it, especially when things get rough. That’s not just uncomfortable; it slows their reaction when something unexpected happens. Big-handed riders can have the opposite issue—if the lever sits too close, it feels cramped and makes fine control harder. Neither situation is great for safe braking.
My suggestion is to treat reach adjustment as part of your standard setup. When assembling new bikes or doing service, set levers to a reasonable middle position. Then, when handing a bike to a rental customer, actually ask them to grab the bars and pull the levers. Spend 20 seconds dialing the reach until it feels natural to them. It’s a tiny effort with a big payoff.
From a B2B standpoint, this attention to fit sends a strong message: your company cares about riders, not just units sold. Customers remember how comfortable and in-control they felt more than they remember your spec sheet. Lever reach is one of those small touches that quietly boosts safety and customer satisfaction at the same time.
Caliper alignment and piston care: quiet but important jobs
Even if you’ve done a perfect bleed and installed fresh pads and rotors, a misaligned caliper will make the brake feel bad. Alignment is simply about making sure both pads hit the rotor evenly. When the caliper is off-center, you get rubbing, pulsing, annoying noises, and faster pad wear. For fleet bikes, that turns into more shop time and higher costs.
The basic alignment trick is easy and works on most setups. With the bike in a stand, slightly loosen the two bolts that hold the caliper to the frame or fork. Squeeze the lever hard so the caliper clamps onto the rotor, let it “self-center”, and while still holding the lever, tighten the bolts evenly to the correct torque. Then release and spin the wheel to check for rubbing.
If you still hear a light “swoosh”, you might need tiny adjustments or to check if the rotor is slightly bent. But in many cases, that self-centering method gets you 90% of the way there. Teaching every technician this simple habit reduces complaints about noise and “draggy” wheels, which rental customers love to point out.
Piston maintenance is the other hidden job that saves headaches later. Over time, grime and brake dust build up around the pistons, and sometimes one piston moves more than the other, causing one pad to rub constantly. When you’re already changing pads, it’s a good moment to clean those piston sides gently with isopropyl alcohol and a cotton swab.
After cleaning, I use a plastic tire lever or piston tool to press them evenly back into the caliper body. This reset helps them move smoothly the next time the brake is applied. It’s not a dramatic upgrade you can market, but in real fleet life it means fewer “my wheel is rubbing again” complaints and longer pad life across the board.
Building a proactive maintenance plan for your fleet
When I look at successful B2B e-bike operations, the big difference isn’t the brand of brake; it’s whether they’re reactive or proactive. Reactive means you only touch the brakes when something goes wrong or a customer complains. It feels cheaper in the moment but ends up more expensive and more risky. Proactive maintenance is the opposite: you plan work before things fail.
I like to think of the maintenance schedule in three levels. First is the quick pre-ride or pre-rental check, done daily. That’s lever feel, a fast visual pad check, and spinning wheels to listen for rubbing or weird noises. It’s not about perfection, just catching obvious issues before a bike goes out. Even a junior staff member can be trained to do this.
Second is a weekly or bi-weekly inspection, depending on how heavily the bikes are used. This is where you bring the bike into the stand, maybe pull the wheel, check rotor thickness and wear, and look carefully for fluid leaks. A rental bike on mountain trails might need this every week; a demo bike at a shop might be fine every couple of weeks. Adjust based on real-world usage, not guesses.
The third level is deep servicing, tied to mileage or time—something like every 1,000 km or every six months, whichever comes first. This is when you do full brake bleed procedures, maybe completely refresh the fluid, and inspect the whole system: levers, hoses, calipers, pistons, and mounts. It’s also a good time to check all your maintenance notes and update the bike’s service record.
Tracking this work by serial number sounds nerdy, but it’s extremely useful. Over time you’ll see patterns: which models eat pads faster, which fleets push brakes the hardest, which locations need more frequent bleeds. That data helps you stock the right spare parts, plan workshop time, and talk confidently about B2B safety and reliability with your own customers.
At Clipclop, we don’t just ship high-performance off-road e-bikes and walk away. We see ourselves as partners in your business, especially on the technical side. A well-maintained fleet is safer, has fewer breakdowns mid-ride, and honestly brings in better reviews and repeat customers. Brakes sit right at the center of that story.
If you’re thinking about setting up a maintenance program, choosing the right brake configurations, or even building custom OEM solutions around your local terrain and use case, feel free to reach out. My team and I spend our days helping dealers, distributors and brand partners dial in both their bikes and their workshop routines. Let’s make your fleet fast, fun—and most importantly—confident and safe to ride.
Frequently Asked Questions (FAQ)
Q1: How often should I bleed the hydraulic brakes on my e-bike fleet?
A: As a general guideline, it’s recommended to perform a brake bleed procedure at least once a year. However, for high-usage fleets, such as rental bikes on demanding terrain, bleeding every 6 months or whenever a lever feels spongy is a safer practice. If your brakes use DOT fluid, they may require more frequent bleeding as the fluid absorbs moisture over time.
Q2: Can I use automotive DOT fluid in my e-bike’s hydraulic disc brakes?
A: Yes, if your e-bike brake system is specified to use DOT fluid (typically DOT 4 or DOT 5.1), you can use high-quality automotive DOT fluid of the same specification. However, NEVER use DOT 5 (silicone-based) fluid, as it is incompatible. Crucially, you must never mix mineral oil vs DOT fluid or use DOT fluid in a system designed for mineral oil, as it will destroy the seals.
Q3: What causes a pulsing feeling when I apply the brakes?
A: A pulsing or vibrating sensation during braking is almost always caused by a warped or unevenly worn brake rotor. This can happen from overheating on long descents or from an impact. You can check for a warp by spinning the wheel and watching the gap between the rotor and pads. While minor warps can sometimes be trued with a special tool, a significantly warped rotor should be replaced to ensure B2B safety.
Q4: Is there a difference between front and rear brake pads?
A: In most e-bike hydraulic brake systems, the front and rear calipers use the same shape and size of brake pads. However, the front brake typically wears out faster than the rear because it provides a larger percentage of the stopping power. It’s important to inspect both sets of pads regularly and follow a consistent pad replacement schedule.
Q5: What is the “bedding-in” process for new disc brakes, and why is it important?
A: “Bedding-in” is the process of breaking in new brake pads and rotors. It involves a series of controlled stops to transfer a thin, even layer of pad material onto the rotor surface. This process is critical for achieving optimal braking power, preventing squealing, and ensuring a long service life. To bed-in new brakes, find a safe, controlled area, accelerate to a moderate speed (around 15-20 km/h), and then apply the brakes firmly and consistently until you slow to walking speed, but without coming to a complete stop. Repeat this process 10-20 times. This is an essential step after any disc brake pad or rotor replacement.
References:
- Shimano Brake Maintenance Resources: https://bike.shimano.com/maintenance.html
- SRAM Technical Documents and Manuals: https://www.sram.com/en/service/manuals–documents
- Park Tool Repair Help – Disc Brake Service: https://www.parktool.com/en-int/blog/repair-help/disc-brake-rotor-removal-installation