Hey, Leo Liang here from ClipClop eBikes.
When I talk with our B2B partners – from rental guys in the Swiss Alps to distributors in sunny California – the same thing always comes up: “Will these e-bikes really pay off after a few seasons?” On paper, power and range look sexy, but long-term ROI is mostly about two boring words: durability and uptime. If a rental bike is always in the workshop, the spreadsheet turns red very fast. That’s why I want to really get into something most people gloss over: how you treat the frame and suspension on your electric off-road bikes.
At ClipClop, we don’t just ship containers and say “good luck.” I see us more as a long-term maintenance partner. Sharing what we’ve learned in production and from fleets all over the world is honestly the core of that. Maintenance is not “fix it when it dies”; it’s a strategy to keep bikes earning every single day, keep riders safe, and protect your brand. I like to think of the frame as the skeleton and the suspension as the muscles. If either one fails, your business is the one that gets hurt.
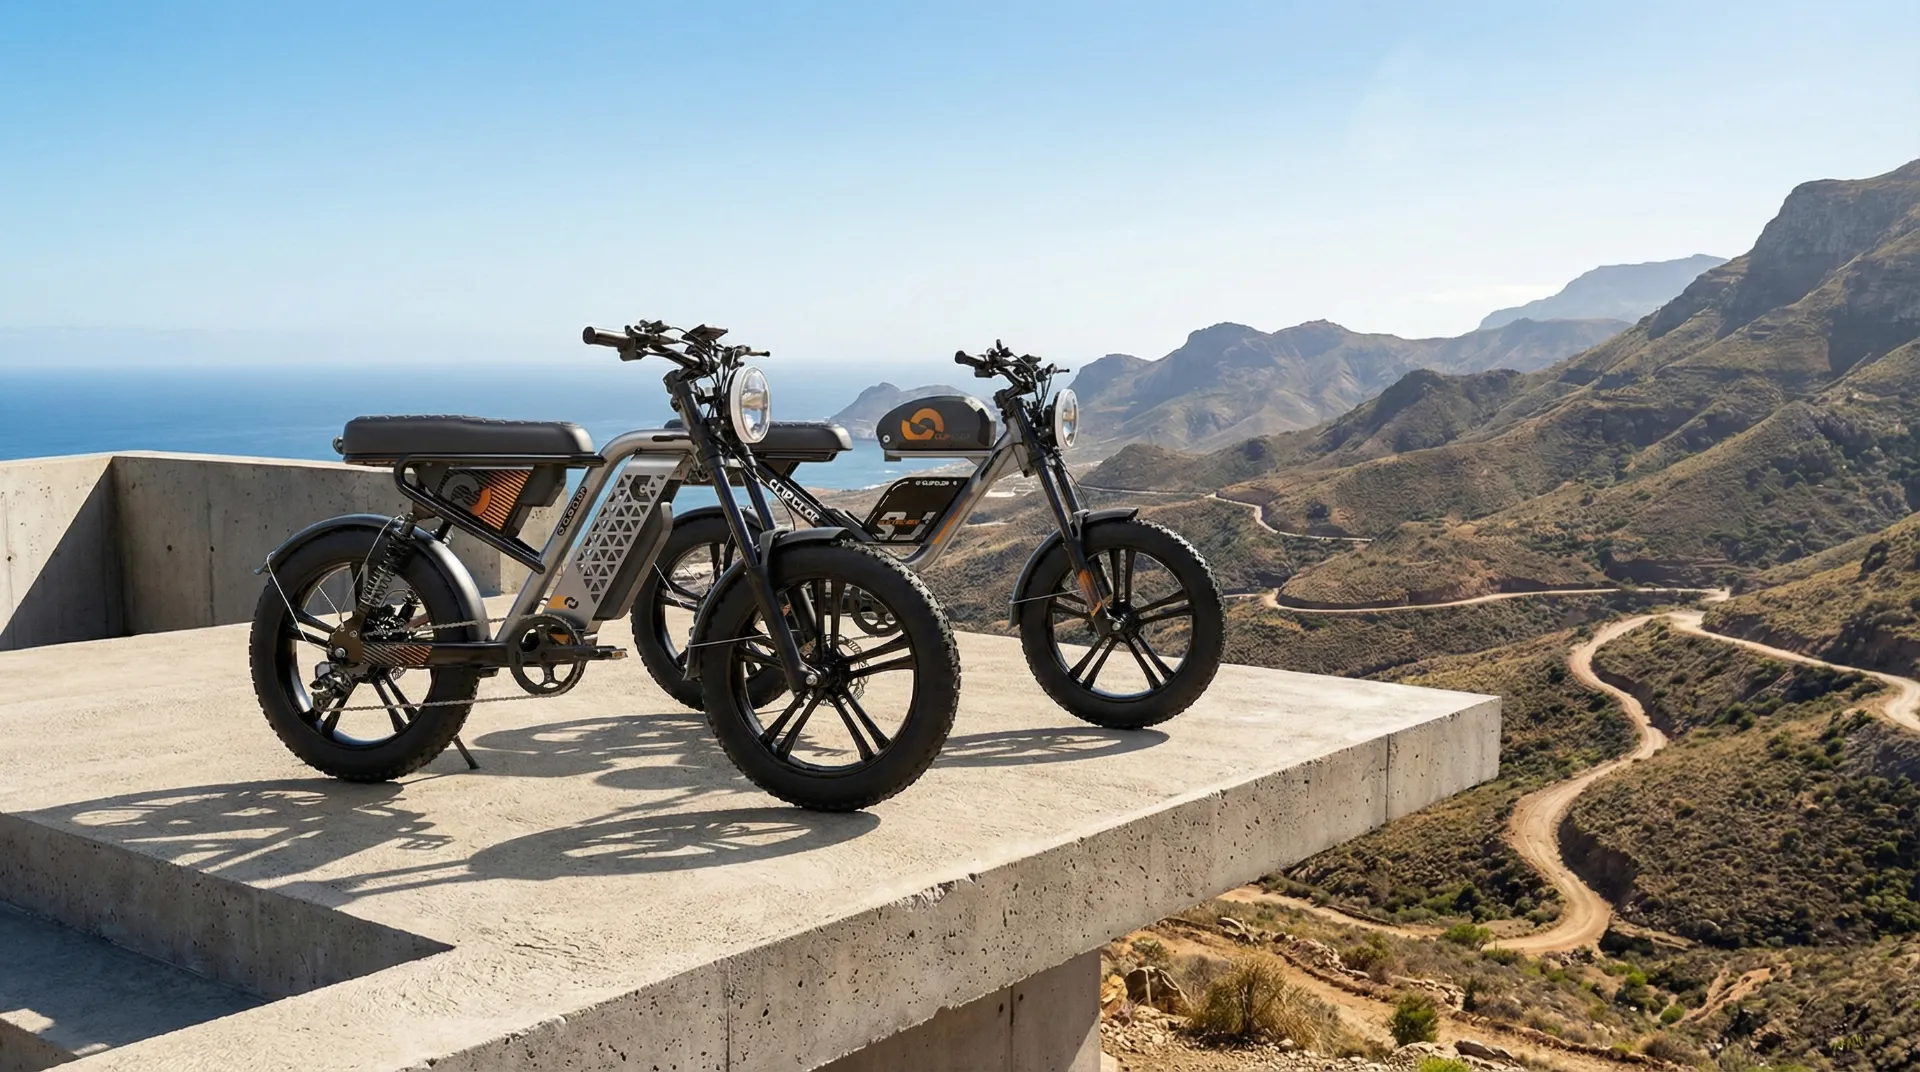
Anyone running a fleet of e-bikes has to understand frame durability and suspension a bit deeper than a normal consumer. Our ClipClop L2, with its 750W motor and 70Nm of torque, is a good example: it puts way more load into the frame and suspension than a normal mountain bike. Add the battery weight, higher average speed, plus tourists who love to ride full throttle over every rock, and you get much faster wear. So the maintenance plan for an off-road e-bike simply has to be more serious than for a casual city bike.
Why is proactive suspension service such a big deal for e-bike fleets?
Let me be blunt: if the suspension is bad, customers will complain, and some of them will crash. For any fleet of electric mountain bikes, the suspension is not a “nice upgrade”; it’s core to comfort, control, and safety. A tired fork or rear shock gives a harsh, unpredictable ride. That’s when riders feel nervous, lose grip, and you start seeing bad reviews like “bike felt sketchy on the trail.” For a rental or tour business, that’s the kind of feedback that quietly kills bookings.
Most suspension brands, like Fox and RockShox, give pretty clear service intervals based on riding hours. A simple lower-leg service is usually around every 50 hours of ride time. More complete work on the damper and air spring often falls in the 100–200 hour range. Those numbers sound big until you remember your bikes might be rented 4–5 hours a day, every day. Suddenly 50 hours is less than two weeks. A lot of fleet owners underestimate this and end up doing “emergency surgery” instead of cheap, planned service.
If those intervals are ignored, the oil breaks down, seals start to leak, and internal parts get scratched up. At that point, a quick service turns into replacing expensive components or even the entire fork or shock. That’s not fun, and it’s avoidable. Most fleet-maintenance bloggers I follow keep repeating a boring but useful rule: “Treat suspension like you treat your car’s engine oil – change early, sleep better.” I completely agree with that mindset.
Electric bikes put more stress on suspension because of the heavier chassis and motor assist. That means regular checks matter even more than on a normal MTB. Before every rental, I like to do a 5-second “bounce test”: push down hard on the front and rear, watch how the suspension moves, and listen. If the rebound is super slow, sticky, or it feels rough, something’s off. If you spot oil on the stanchions or hear strange clunks, that bike should not go out with a customer.
Train your staff so they’re not just cleaning bikes but actually noticing these things. Teach them to do the bounce test, spot oily rings on the fork, and pay attention to weird sounds. This is your first filter. Then, pair that with a calendar-based service plan built from the riding-hour recommendations. It looks like extra work on paper, but in reality it saves your budget and keeps your fleet earning instead of sitting half-unusable in the warehouse.
E-Bike Fleet Maintenance Quick-Reference Chart
| Component | Key Maintenance Task | Recommended Frequency (for B2B Fleets) | Rationale & Impact of Neglect |
| Front Fork & Rear Shock | Basic Lower Leg / Air Can Service (Oil & Seals) | Every 25-50 ride hours (or 2-4 weeks of heavy use) | Rationale: Maintains lubrication, prevents internal wear. <br> Impact of Neglect: Poor performance, sticky suspension, costly stanchion damage. |
| Front Fork & Rear Shock | Full Damper & Air Spring Rebuild | Every 100-200 ride hours (or as per manufacturer’s B2B recommendation) | Rationale: Restores performance and control. <br> Impact of Neglect: Unpredictable handling, loss of damping, potential safety risk. |
| Frame (Welds, Pivots, High-Stress Areas) | Visual Frame Crack Inspection | After every thorough wash | Rationale: Early detection of material fatigue. <br> Impact of Neglect: Catastrophic frame failure, serious rider injury, business liability. |
| Suspension Pivot Bolts | Torque Check with a Torque Wrench | Monthly, or more frequently in high-use scenarios | Rationale: Ensures suspension functions correctly and prevents frame damage. <br> Impact of Neglect: Creaking, poor handling, damage to bearings and frame linkage. |
| Frame Surface & Steel Components | Clean, Dry & Apply Protectant | After every ride, especially in wet/salty conditions | Rationale: Corrosion Prevention protects aesthetics and structural integrity. <br> Impact of Neglect: Oxidation, rust on bolts, diminished resale value. |
| Suspension Seals & Stanchions | Wipe Down & Clean | After every single ride | Rationale: Prevents abrasive dirt from damaging seals and stanchions. <br> Impact of Neglect: Leaking seals, contaminated internal oil, reduced suspension sensitivity. |
What really matters in seal and bushing care?
Suspension seals and bushings are tiny parts that quietly decide whether your fork feels silky or terrible. The wiper seals you see at the top of the fork lowers – and on the air can of the rear shock – have two main jobs: keep the oil in, and keep the dust, mud, and water out. Once they age or get damaged, dirt sneaks in, mixes with the bath oil, and turns into something like liquid sandpaper. That “sandpaper” then eats your stanchions and bushings from the inside.
The easiest win here is a simple, boring cleaning routine. After every ride in dusty, sandy, or muddy conditions, just wipe the fork stanchions and rear shock body with a clean, soft cloth. No pressure washer blasting into the seals – this is something many new fleet operators get wrong. High-pressure water feels satisfying, but it literally pushes grit past the seal. A gentle hose, a soft brush, and some patience are much safer.
Sometimes I’ll put a tiny bit of suspension-specific lubricant on the stanchions, cycle the fork a few times, and then wipe off the extra. A lot of maintenance bloggers suggest this trick, and it does help keep the seals flexible and sliding nicely. The key is not overdoing it – if there’s a visible oil film left, it just acts like a dirt magnet. Light touch is the game here, not bathing the fork in lube.
On top of daily cleaning, you want a schedule where seals and foam rings get replaced during each proper fork service. These are consumable items, not lifetime parts. Internal bushings, which guide the stanchions inside the lowers, also wear out over time. A quick test: hold the front brake, rock the bike back and forth, and feel for knocking at the fork. If there’s play, that usually means bushings are tired and need a mechanic’s attention.
For a B2B fleet, catching this play early is a big deal. Letting worn bushings go too long can damage the fork chassis itself, which is much more expensive than just replacing small parts. So I like to think of seal and bushing care as cheap insurance. A bit of cloth, a bit of lube, and a clear schedule can easily add seasons of life to a fork that’s being ridden hard by different riders every day.
How do you actually master frame crack inspection?
The frame is the one part that absolutely cannot fail. With e-bikes, the motor torque and extra weight mean the frame sees more load and more fatigue than a regular bike. So, for any fleet operator, frame inspection isn’t “nice to have”; it’s mandatory. A frame failure in the middle of a tour is basically your worst-case scenario: injury risk, liability, and a lot of angry emails.
The first step is simply making inspection a routine, not a random thing you do when you “have time.” I like to tie it to your deep-clean cycle: whenever a bike gets a proper wash, it also gets a frame check. Dirt hides tiny cracks, so the frame has to be clean. Then you slowly scan the welds, the head tube area, the bottom bracket, all the suspension pivots, and the motor and battery mounts. These are classic stress zones.
Most cracks first show up in the paint: fine lines, tiny spider-web shapes, or a weird bump on a weld. Sometimes it really is just paint, but you can’t assume that. One simple trick I use: run a fingernail gently across the suspicious line. If your nail catches, it’s worth taking seriously. Bloggers who specialize in frame inspection love this low-tech test, and honestly, it works way better than people expect.
For ClipClop frames, we use 6061 aluminum alloy. It’s strong, light, and proven, but like any aluminum, it tends to crack instead of bending slowly. That means visual cues are super important. If something looks off and you’re not sure, remove that bike from service. Don’t “just send it one more day.” A bike that maybe has a crack should not be out with a paying customer, no matter how busy the day is.
Also, don’t ignore sounds. A frame crack sometimes starts as a mysterious creak or groan under load. Yes, creaks can also come from pedals, seatposts, or loose bolts, but if the noise stays even after you’ve checked everything obvious, be suspicious. In my own process, “weird, repeatable sounds” plus “something odd at a weld” equals “this bike gets a professional inspection before it earns another cent.”
Why does correct torque on pivot bolts matter so much?
On a full-suspension e-bike, the rear end is a little factory of moving parts. All those links and pivots only work properly if the bolts are tightened to the right torque. Too loose or too tight, and you’re asking for trouble. It’s one of those details that feels small until you get a complaint like “bike feels wobbly” or “rear end is making this horrible knocking noise.”
If pivot bolts are under-torqued, you’ll usually feel play in the back of the bike. Riders might describe it as the rear end “wagging” or knocking, especially when braking or hitting bumps. Besides being annoying, that movement can slowly ovalize the frame holes and destroy the bearings. For a rental fleet, this is pure money leaking out over time. A pivot that was supposed to last a few seasons can die in one if it’s always loose.
Over-tightened bolts are just as bad, but in a different way. When someone cranks a bolt far beyond the spec, it can crush the bearings and make the suspension bind. The result: the shock and linkages don’t move freely, the bike feels harsh, grips less, and the rider gets bounced around instead of floating over bumps. That extra stress also hits the frame, and you might end up with cracks around the linkage.
Every manufacturer, including us at ClipClop, publishes specific torque values in Newton-meters for every pivot and key fastener. Honestly, the simplest “pro move” for any B2B operation is to buy a good torque wrench and train every mechanic and serious staff member to use it properly. One blog I read from a big bike rental in Europe basically sums it up as: “If you don’t torque, you’re just guessing.” I completely agree with that line.
I recommend adding “torque check on pivots and main hardware” as a recurring task in your maintenance calendar. How often depends on terrain and usage, but for busy off-road fleets, doing it every few weeks or after a particularly harsh riding period is smart. It doesn’t take long, and the payoff is a quieter, more stable bike and far fewer surprises in the workshop.
How do you stay ahead of corrosion?
Most of our ClipClop L2 frames use 6061 aluminum, which doesn’t rust like steel, but that doesn’t mean you can ignore corrosion. Aluminum can oxidize, especially with salt in the air, road salt, or just humidity over time. Then you also have steel parts like bolts, chainrings, cassettes, and many small pieces that really do rust. For fleets near the coast or in winter areas, this becomes a big topic very quickly.
The foundation is super basic: keep the bikes clean and dry. After wet or salty rides, wash the bike with fresh water and mild soap, but again, avoid high-pressure spraying directly into bearings, suspension, or motor areas. Pay attention to hidden spots: under the bottom bracket, around pivot hardware, under fenders, and near battery mounts. That’s where mud and salty water like to sit and slowly cause damage.
After washing, drying matters more than people think. I normally recommend hand-drying with a clean cloth, especially around bolts and pivots, and then letting the bike sit in a ventilated space for a bit. Parking a wet bike in a closed, humid storage area overnight is basically asking for corrosion to start. A lot of fleet bloggers mention one very simple rule: “Never put a wet bike to sleep.”
If you want to go further, use a bike-specific frame polish or protective spray every few weeks. It leaves a thin barrier on the paint, helps water bead off, and makes cleaning faster next time. For steel bolts and drivetrain parts, a light coat of water-displacing spray or anti-corrosion product works really well – again, light, not dripping. Any deep scratch or chip in the paint should be covered with touch-up paint as soon as you notice it.
This whole routine doesn’t take long, but over a few seasons it can be the difference between a fleet that still looks fresh and one that visibly “ages badly.” And appearance matters a lot for rentals – customers judge value in the first few seconds when they see the bike. Clean, corrosion-free frames simply rent better and keep their resale value when you decide to renew your fleet.
What frame and suspension checks should you do before every ride?
For rentals and tours, a quick pre-ride check is your last line of defense. It doesn’t need to be a full service, but it has to be consistent and focused on safety. I always tell partners: a 60-second check can prevent a 60-minute rescue mission later.
Start with the frame. Do a fast visual scan around high-stress areas: head tube, all visible welds, suspension pivots, and the motor and battery mounts. You’re looking for anything obviously wrong – cracks, big dents, deep scratches that weren’t there yesterday. Give the handlebar and stem a good twist while clamping the front wheel between your legs; nothing should move independently. If it does, tighten or pull the bike from service.
Next, check the wheels and axles. Quick-releases or thru-axles must be fully closed and properly tight. This sounds basic, but I’ve seen enough bikes with half-closed levers to know it’s worth checking every single time. A loose axle not only ruins handling, it can literally allow the wheel to come out. That’s the kind of failure you only need to see once to become paranoid about it forever.
For the suspension, wipe the stanchions quickly so you can actually see what’s going on. Then do the bounce test again: compress the front and rear a few times. You’re watching for smooth travel and a controlled return, no harsh top-out or weird hesitation. If you hear grinding, clunking, or if the fork/shock barely moves, that bike should not go out. Also, flick the lockout lever on and off to make sure it works.
Finish with tire pressure. This is partly about flat prevention and ride quality, but it also helps the suspension do its job. Under-inflated tires can make the bike feel vague and heavy; over-inflated ones give a harsh ride and less grip. Many fleet operators keep a simple pressure chart based on rider weight and terrain, which staff can follow without thinking too much. That’s exactly the kind of “simple system” that keeps your operation consistent even when you have new staff.
How does terrain change your maintenance schedule?
Not all fleets live the same life. A group of e-bikes doing relaxed city tours has a completely different wear pattern compared to bikes that spend their days bombing rocky descents and muddy forest trails. If your maintenance schedule ignores your actual terrain and usage, you’ll always feel like bikes are failing “earlier than they should.”
In aggressive off-road environments – steep climbs, rock gardens, roots, constant mud and water – everything works harder. Suspension fluid heats up and breaks down faster, seals chew through grit, and pivot bearings see huge loads. If a brand recommends a 50-hour service interval for normal use, I’d treat that as the absolute maximum in these conditions. Many bloggers who manage mountain rental fleets say they aim for 30–40 hours in harsh weather, and that lines up with what we see from data on our partners’ fleets.
The frame also needs more frequent crack checks in this scenario. Big hits, jumps, and constant vibration all add up as fatigue. So if you’re in a bike-park or alpine-type operation, I’d schedule frame inspections and bolt torque checks much tighter – maybe weekly in peak season. It sounds intense, but so is the riding your customers are doing.
On the other hand, fleets that run mostly on pavement or light gravel don’t get hammered in the same way. Suspension still ages, but usually slower. The annoyances in urban environments are more about road salt, grime, and constant small vibration. That means corrosion prevention and regular torque checks on key bolts become the bigger priorities, rather than extreme-impact damage.
For high-volume tourist areas, even on easy terrain, usage hours still accumulate quickly. Tires, brake pads, chains, and cassettes might wear out just from sheer mileage. I like to see operators track actual usage – even a simple spreadsheet or rental-system export helps – and then tie maintenance tasks to real hours instead of just guessing. The more your plan matches your real terrain and riding style, the less “mystery breakdowns” you’ll see.
Why work with a manufacturer that thinks B2B first?
Choosing an e-bike brand as a B2B partner is very different from buying a personal bike. Spec sheets and pretty photos are only half the story. The other half is: when something breaks in peak season, can you get the part, the info, and the support fast enough to keep the bike earning? That’s where a B2B-focused manufacturer matters a lot.
At ClipClop, we’ve basically built our whole approach around that question. We keep a wide stock of spare parts: suspension seals, pivot bearings, hardware, even frame components for key models. When one of your bikes is down, I want you to be able to say, “No problem, the part is already on the way,” instead of parking the bike for a month. Downtime is the real enemy for fleets, not just broken parts.
Technical support is another huge piece. Our team is not a generic call center; they live and breathe our frames, motors, and suspension choices. If your mechanic needs torque values for a pivot, or step-by-step guidance for a damper service, there are real people who can walk them through it. Some fleet-focused bloggers often complain that “the brand never replies on time” – we try hard to be the opposite of that experience.
We also know that every market is different. A sandy beach rental needs different tires, maybe different fenders and sealing, compared with an alpine trail bike. For OEM and bigger partners, we’re happy to tweak things: tire spec, suspension tune, even frame geometry or mounting points if the volume makes sense. The idea is simple: the closer the bike matches your real use case, the less drama you’ll have later.
In short, our success is tied to yours. If your fleet is reliable, safe, and profitable, you’ll keep growing, and we grow with you. That’s the mindset we bring from the first design sketch all the way through after-sales support and spare-parts planning.
Call to action
If you’ve read this far, you probably care about more than just the next shipment price. You care about whether your electric off-road bikes will still be working, safely, a few seasons from now. That’s exactly where smart suspension and frame care, plus a solid B2B partner, make all the difference.
At ClipClop, we focus on manufacturing and exporting high-performance electric off-road bikes and on giving dealers, wholesalers, and brand partners a one-stop setup – from technical support to complete vehicle packages. If you’re wondering which model fits your terrain, how to configure a fleet, or how to build a maintenance plan that actually works in real life, my team and I are here to talk.
Reach out to us, tell us about your terrain, your customers, and your goals. Let’s see how we can help you build an e-bike operation that’s not only fun for riders, but also reliable and profitable for you over the long run.
Frequently Asked Questions (FAQ)
Q1: How often should I really service the suspension on a rental e-bike that’s used daily?
For a rental e-bike under heavy daily use (4-6 hours/day), we strongly recommend cutting the manufacturer’s recommended service intervals in half. If the manual suggests a 50-hour lower leg service, perform it every 25 hours or, to simplify, on a bi-weekly schedule. This proactive approach is crucial for B2B maintenance as it prevents the accelerated wear caused by high-mileage and varied rider weights, ultimately extending the life of the fork and shock and ensuring a consistently safe and smooth ride for your customers.
Q2: Is a small paint chip on an aluminum frame a serious concern?
While a small paint chip on a 6061 Aluminum Alloy Frame doesn’t immediately compromise its structural integrity, it should be addressed promptly as part of your corrosion prevention plan. The paint is the first line of defense against the elements. A chip exposes the raw aluminum, which can lead to surface oxidation, especially in humid or coastal climates. We recommend cleaning the area and sealing it with a small amount of touch-up paint to maintain the frame’s protective layer and appearance.
Q3: Can I use a general-purpose degreaser for cleaning the suspension seals?
No, you should avoid using harsh, general-purpose degreasers directly on suspension seals. These chemicals can dry out and damage the rubber compounds, leading to premature cracking and failure. For proper seal & bushing care, stick to a mild soap and water solution for cleaning. After cleaning, you can use a suspension-specific silicone spray to lubricate the stanchions and condition the seals, but always wipe off any excess.
Q4: What’s the single most important tool for in-house e-bike maintenance?
A quality torque wrench. For any operator managing an e-bike fleet, this tool is non-negotiable. Applying the correct torque for pivot bolts, stem bolts, and axle bolts is fundamental to both safety and frame durability. It eliminates the guesswork that leads to stripped threads from over-tightening or component failure from loose bolts. It is a critical investment for professional and reliable B2B maintenance.
Q5: My fleet operates in a very dusty, desert environment. What extra maintenance steps should I take?
In extremely dusty conditions, your maintenance focus should be on cleaning and lubrication. The fine, abrasive dust can wreak havoc on drivetrains and suspension systems. The fork service interval should be shortened significantly, as dust is highly effective at contaminating bath oil. Clean and lubricate the chain after every single rental. Additionally, make seal & bushing care a top priority by wiping down stanchions and seals frequently throughout the day to prevent dust from being ingested into the suspension.
References:
- HOVSCO. (2025, May 19). How To Maintain Full Suspension eBike Suspension Components? Retrieved from https://www.hovsco.com/blogs/blogs/how-to-maintain-full-suspension-ebike-suspension-components
- Leoguar Bike. (2025, May 27). What Happens If Your Ebike Frame Cracks? Signs and Next Steps. Retrieved from https://leoguarbike.com/blogs/news/what-happens-if-your-ebike-frame-cracks
- Fly Rides USA. (2023, May 25). When & Why to Service Your eBike Fork. Retrieved from https://flyridesusa.com/blogs/news/when-why-to-service-your-ebike-fork