Walk into any showroom and you can usually spot the premium e-bike in seconds. It’s not just the motor spec or the battery size—it’s the way the frame looks like it was born as one flowing piece of metal, not stitched together in a hurry.
At ClipClop, I’ve learned that the “secret” often lives after welding. TIG welding can be clean, but the bead still announces itself unless you do the hard, careful work of grinding, blending, and finishing.
For distributors and OEM partners, this stage isn’t decoration. Done well, it protects fatigue life, improves coating adhesion, and makes the product easier to position at a higher price tier—especially for frames carrying heavy 48V 15Ah packs and high-torque motors.
I’m going to break down how premium weld finishing is actually done, where it can go wrong, and what details matter most when you’re buying at scale.
Why smooth welds signal “premium” in a showroom
A customer’s hand is brutally honest. They’ll run fingers over the seat stay junction or the head tube cluster and decide—without saying a word—whether the bike feels “luxury” or “industrial.”
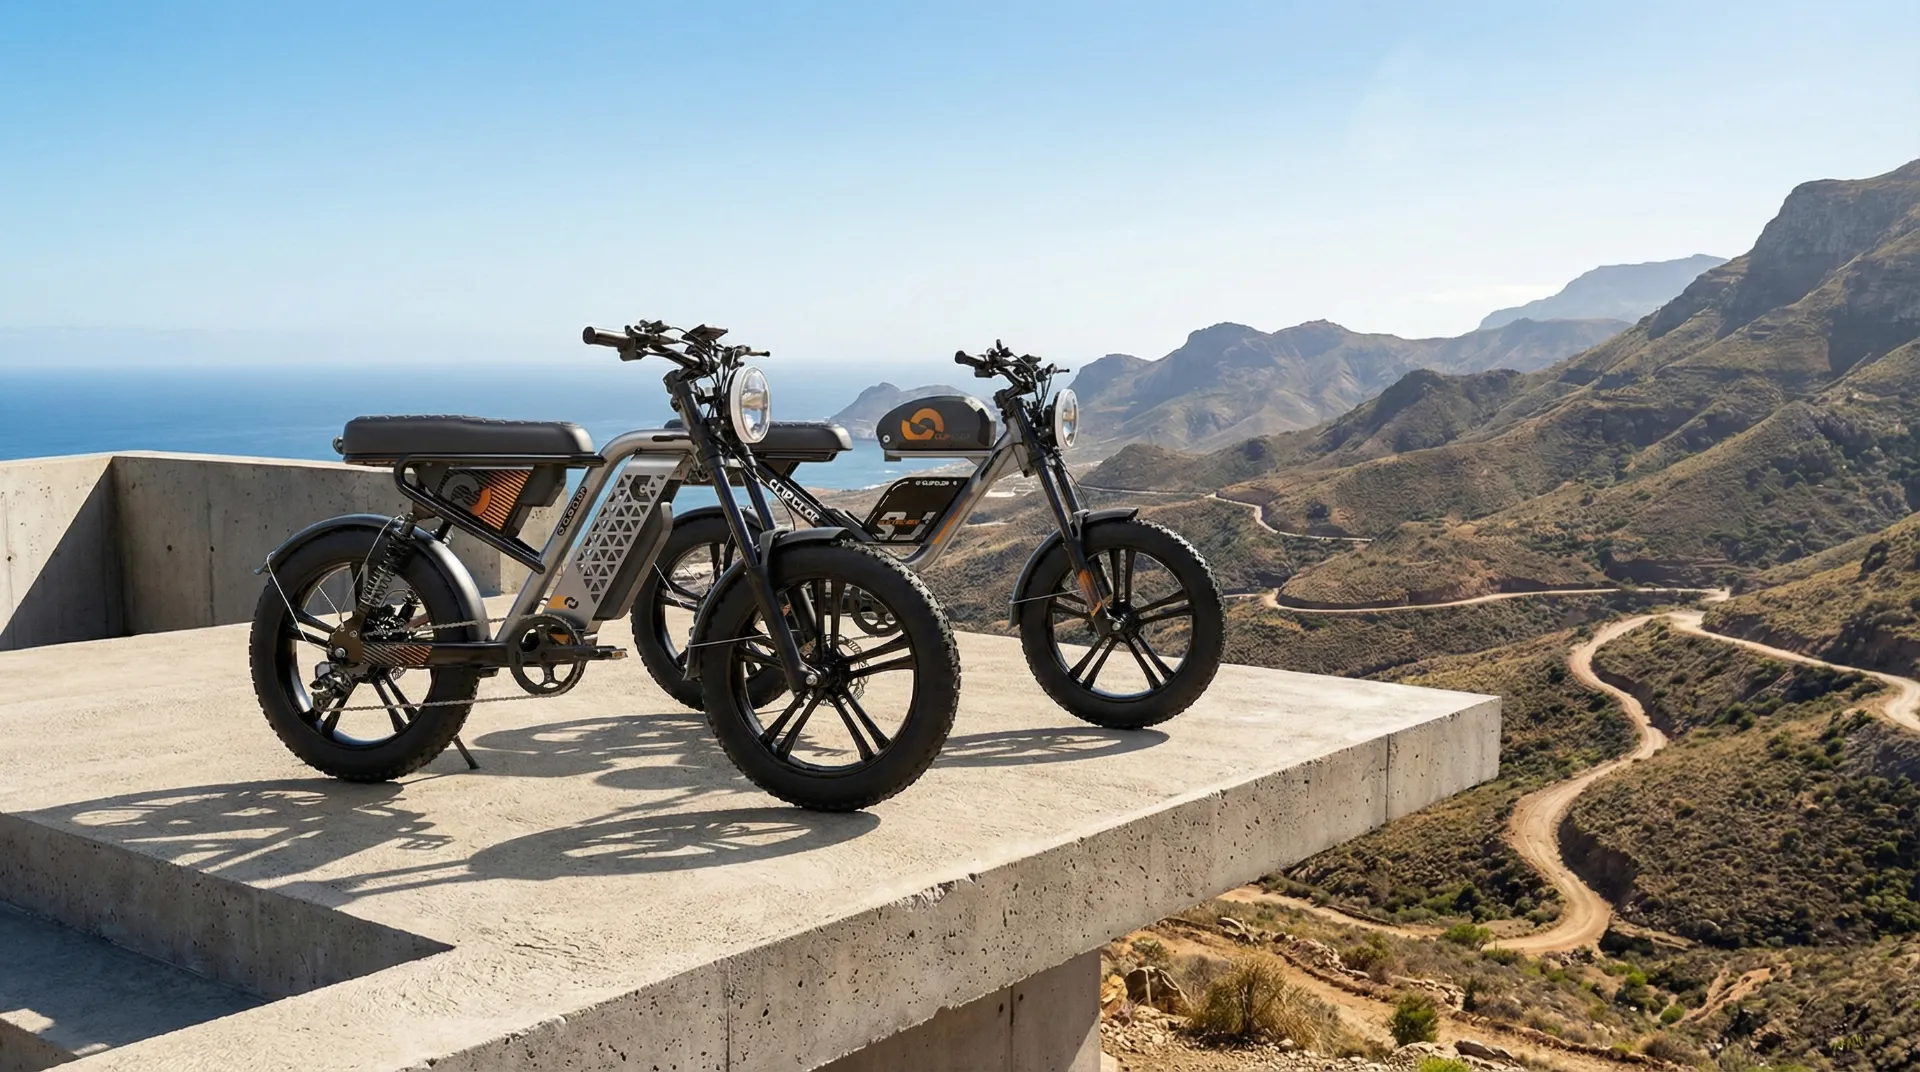
That’s why weld seam blending matters for the L1 model in particular. The design language depends on clean tube transitions, and any leftover “fish scale” texture becomes visual noise under paint, or worse, under anodizing.
There’s also a practical side: smoother joints reduce edge-thin paint zones. On sharp ridges, powder coating can pull back during curing, creating weak spots that chip early and trigger warranty headaches later.
Leo likes to remind our team that “the weld is the signature of the craftsman.” Robotic welding gets you consistency, but hand finishing is often what delivers that final bit of polish customers pay for.
The real workflow: grind, blend, then finish
People often use these words interchangeably, but in a factory they’re different steps with different tools and risks.
Grinding is the heavy removal stage: you’re lowering the weld reinforcement toward the tube surface. Blending is shaping the transition so there’s no “step.” Finishing is controlling surface texture so paint or anodizing behaves predictably.
Here’s the simplified map we use when explaining the process to B2B partners:
| Stage | Main goal | Common tools | QC focus | Biggest risk |
|---|---|---|---|---|
| Grind (bulk) | Remove excess bead height | Flap discs, belt tools | Don’t thin parent tube | Over-grinding, heat build-up |
| Blend (shape) | Create a zero-step transition | Orbital sanding, contour abrasives | Smooth geometry at the joint | Leaving dips/notches (“stress risers”) |
| Toe dressing | Reduce fatigue crack initiation | Burrs, fine abrasive points | Smooth weld toe radius | Cutting into the weld throat |
| Finish (texture) | Uniform surface for coating | Multi-grit sanding, Scotch-Brite | Consistent roughness (Ra) | Scratches that telegraph through coating |
| Deburr/edge break | Improve safety + coating wrap | Files, brushes, deburring tools | No sharp corners | Thin paint edges, early corrosion |
The table looks neat; reality is messier. Aluminum loads discs, tight corners fight your tool angles, and every frame junction has its own personality.
That’s why standard work instructions matter. In volume production, “good” isn’t enough—you need repeatable outcomes from frame #1 to frame #1,000.
How to smooth a weld without weakening the joint
The fear from buyers is understandable: “If you grind it, aren’t you making it thinner?” Yes—if someone is sloppy.
Professional reinforcement removal targets the metal sitting above the tube surface, while preserving the weld throat and the parent material thickness where strength truly lives.
The most important zone is the weld toe, where the bead meets the tube. That edge is a classic fatigue crack starter, especially on e-bikes that see high torsional loads from motors and heavy batteries.
Toe dressing is basically stress management. When you soften the toe geometry, stress spreads more evenly through the joint instead of concentrating at one sharp line, which helps frames survive demanding fatigue protocols.
If you want a simple mental picture: a rough toe acts like a notch in a soda can tab. A smooth toe acts like a gentle curve that doesn’t “invite” cracks.
Material science realities: 6061-T6, HAZ, and heat treatment sequencing
Most premium aluminum e-bike frames live in 6061 territory because it’s weldable and strong when properly heat treated.
But welding creates a heat affected zone (HAZ) where the original T6 temper is lost. That means the metal next to the weld softens until you restore strength through post-weld heat treatment and aging.
At ClipClop, we prefer doing the bulk shaping before the final T6 cycle, because the material is more forgiving during earlier stages. Then we do the final surface finish after heat treatment, when the frame is at its intended hardness.
If you’re dealing with 7005 series frames, the abrasive strategy changes. The alloy behaves differently, and overheating during finishing can shift local properties in ways you don’t want, especially if someone leans too hard and cooks a junction.
Filler choice also matters if your brand sells “raw metal” aesthetics. ER4043 can be excellent for crack resistance but may show color mismatch after anodizing; ER5356 often matches better but demands tighter welding control.
Surface preparation: where premium paint actually starts
A gorgeous weld blend can still turn into a bad-looking bike if surface prep is rushed.
After finishing, you have to remove oils, sanding debris, and oxide layers that interfere with bonding. Aluminum oxidizes fast, and that invisible film can sabotage coating adhesion if you don’t treat it correctly.
One sneaky issue is porosity and pinholes. If tiny voids exist near the surface, curing heat can push trapped gas outward and cause outgassing bubbles—exactly the kind of defect that makes a distributor’s life miserable.
Edge rounding is also a coating win, not just a safety step. Powder coat wants to “wrap” around gentle radii; it hates razor edges where film thickness drops and chipping starts.
For coastal or winter-salt markets, smoother transitions and proper pretreatment reduce corrosion start points, because water has fewer places to sit and fewer micro-cracks to exploit.
Quality control and compliance: what B2B buyers should demand
A frame that looks perfect but fails fatigue testing is a branding nightmare. That’s why weld finishing needs to be tied to inspection, not treated as a cosmetic department.
During finishing, QC should be checking for undercut, overlap, and grinding-induced notches. You can’t “polish away” a structurally bad weld; you can only make a good weld look better.
For international buyers, the usual suspects show up: ISO 4210 for bicycle safety requirements, EN 15194 for EPAC-style e-bike compliance, and market-specific rules like NOM requirements where applicable. Testing programs like EFBE Tri-Test are also part of the conversation for brands chasing higher credibility.
Consistency is the hidden profit lever. When robotic welding is paired with standardized hand finishing, you reduce batch variation, lower rework, and keep lead times stable—exactly what distributors need when containers are already booked.
Clear documentation helps too. When specs are written down—tooling, grit progressions, inspection points—language barriers stop being a quality barrier.
Picking the right OEM/ODM partner for premium weld finishing
If you’re sourcing frames, don’t only ask “Can you make it smooth?” Ask how they control it.
A serious supplier can explain their finishing sequence, show how they protect the weld throat, describe how they manage heat during grinding, and provide batch-level inspection records that tie finish quality to repeatable process windows.
The L1 platform is a good example of why this matters. With motor options up to 750W and fat-tire configurations like 20×4.0, the frame sees real forces, not just “commuter bike” loads, so finishing must support durability, not just appearance.
In the end, weld smoothing is one of those rare manufacturing steps that improves both the story you tell customers and the mechanical life of the product. And in B2B, that combination is gold: fewer claims, stronger brand perception, and a bike your dealers are proud to put under bright lights.
If you want, I can also provide a shorter “buyer checklist” version of this article (one page) that your sourcing team can use during factory audits.
FAQ & Extended Reading
Q1: Does grinding the weld weaken the e-bike frame? A: Not if done correctly. Professional weld reinforcement removal only removes the excess filler material. By following up with T6 heat treatment, we ensure the 6061-T6 welded strength recovery is complete. In fact, weld toe dressing can actually increase fatigue life by reducing stress concentrations.
Q2: Why is “weld blending” important for powder coating? A: Weld blending creates a smooth surface that prevents “shadowing” or thin spots in the powder coat. It also eliminates pinholes before powder coat, which can cause bubbles during the curing process, ensuring a flawless, durable finish.
Q3: How does ClipClop ensure consistency in weld finishing? A: We use a combination of robotic welding for the base structure and highly trained technicians for the hand-finished welds. This is backed by a strict in-process inspection protocol and visual inspection at every stage.
Q4: Can you provide customized finishes like brushed aluminum or mirror polish? A: Yes. We offer various metal finishing services, including brushed aluminum finish, satin finish, and high-gloss powder coats. These require specific weld seam blending and polishing techniques which we have perfected.
Q5: What certifications do your frames meet? A: Our frames are designed to meet and exceed ISO 4210 frame testing and EN 15194 e-bike compliance standards. We also provide support for NOM safety standards for our Mexican B2B partners.
References: